
This tutorial explains how to schedule excel export using LDAPSQL Select Statement.
To export data first connect to the directory server (To create a new connection please see Connecting to a LDAP Server using LDAP Admin Tool)
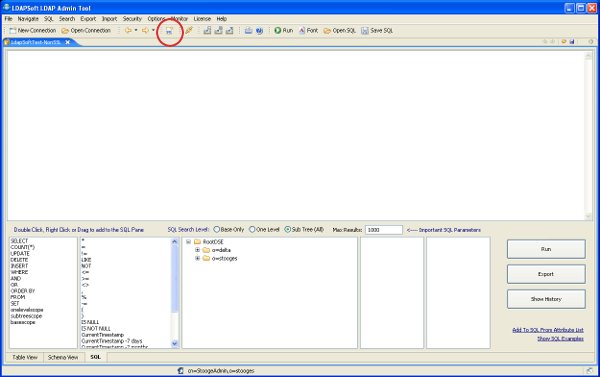
After successful connection, select the SQL button from the top menu, this will open the sql tab where you can enter the sql statements.
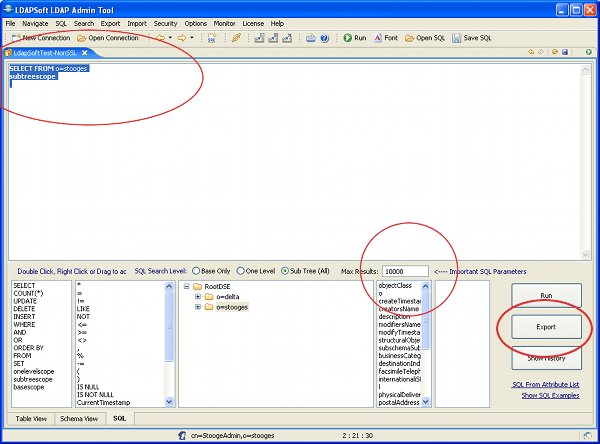
To export all records from container o=stooges, enter a sql statement as:
SELECT FROM o=stooges
subtreescope
and also increase the Max Results to 10,000 as we are expecting around 2800 records.
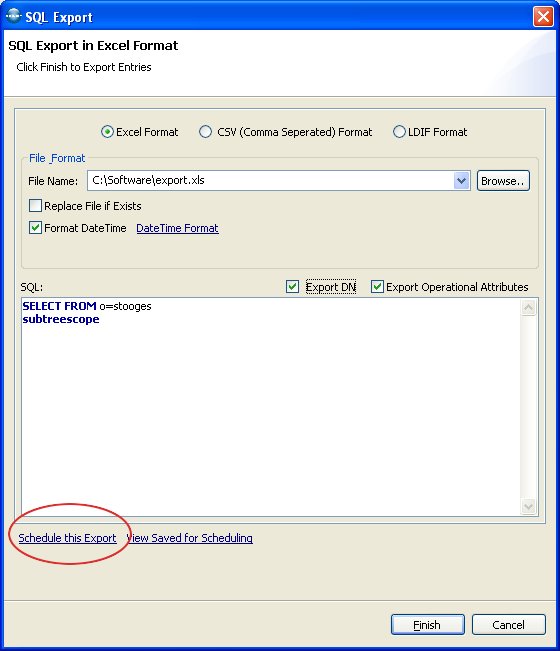
Now Click the Export button, select the excel format radio button, enter the name of the export file, select the 'Export DN' and 'Export Operational Attributes' and then click on the 'Schedule this Export' link.
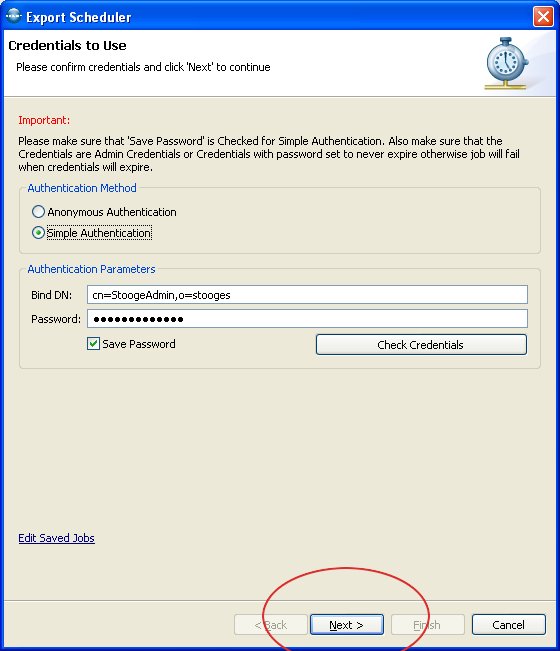
If you are using Simple Authentication, make sure that the save password box is checked and the credentials are admin credentials or credentials with password set to never expire otherwise task will fail when the credentials will expire. Click Next to continue.
If you want scheduler to write to a file, check the 'Write to a file' button and provide the file name and file name prefix date time format. Make sure you check the 'Replace File if exists' if you are using simple date time format like (mmddyy) and plan to run this task more than once a day. Click Next to continue.
 |
|
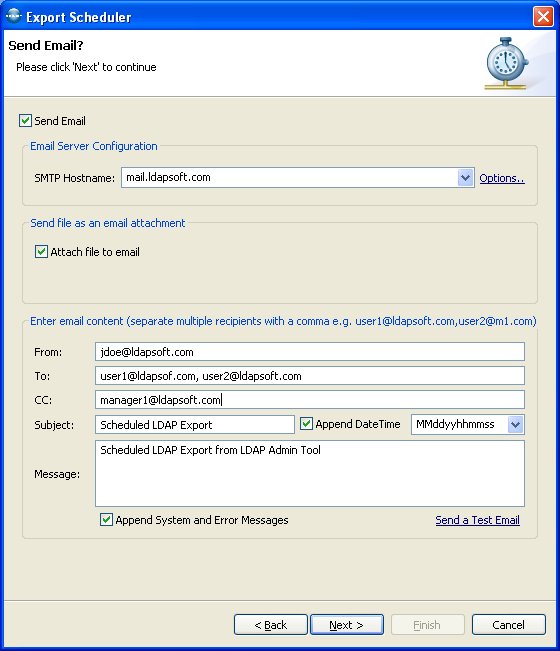
Check the 'Send Email' box if you want to send email after the scheduled process is over and/ or want to send file as an attachment. Enter the necessary information and Click Next
 |
|
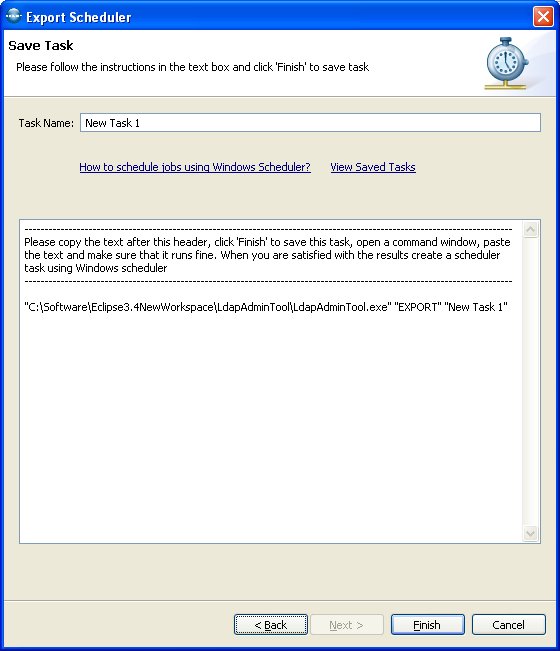
Enter a unique name for this task, select the text after header from the text box, open a command/terminal window, paste the text and click enter. Once you are satisfied with the results, create a scheduler task using windows scheduler or Linux cron. Click Finish to save this task.
 |
|
See Also:
How to schedule task using Windows scheduler
How to schedule task using Linux cron
Query LDAP Using Select Statements